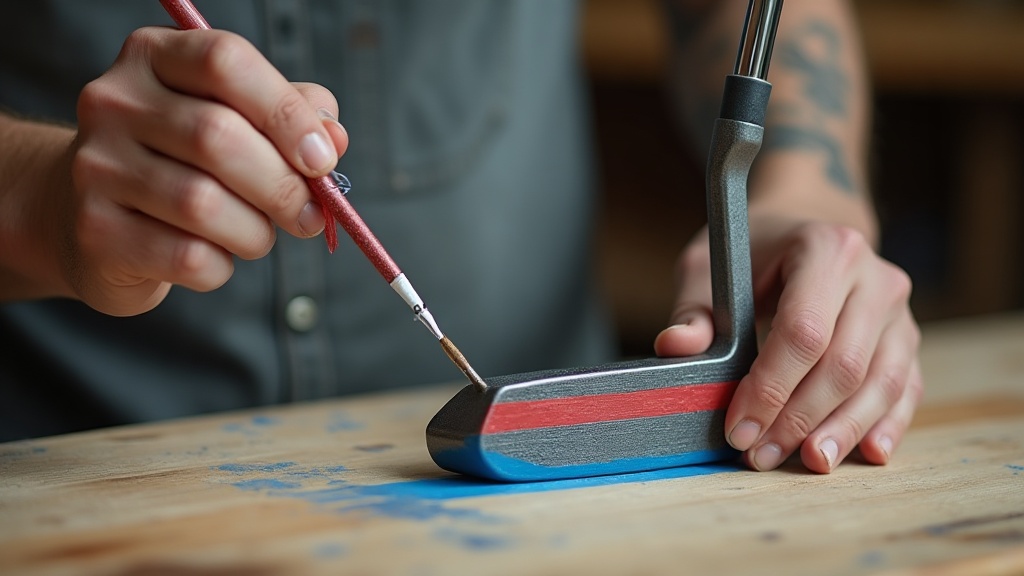
How to Paint A Putter: Step-by-Step Guide
To paint a putter and get a finish that holds up to bag chatter and green-side use, strip the factory coating first, then prime the bare metal. Skipping prep guarantees peeling within a few rounds. This guide covers the full sequence — from shaft removal to curing — plus the failure points that force you to start over.
Tools and Materials
You need the right gear before you begin. Pick up paint stripper or acetone (Citristrip works well on most finishes). Get sandpaper in 220, 400, and 600 grit — wet/dry type for the finer work. Low-tack masking tape protects the face, sole, and logos. Use high-adhesion metal primer, preferably automotive-grade such as Rust-Oleum Clean Metal Primer. For paint, choose enamel spray paint (Rust-Oleum Painter’s Touch or VHT Engine Enamel). Acrylics need a clear coat on top or they peel quickly. Pick a clear coat in gloss or matte from the same brand as your paint to avoid compatibility issues. If you plan to remove the shaft, you also need a heat gun, shaft puller, or epoxy solvent. Finally, wear nitrile gloves and a respirator rated for organic vapors when using strippers and spray paint.
Preparation: The Make-or-Break Decisions
Should You Remove the Shaft or Mask It?
Remove the shaft if you want a clean paint line at the hosel. Heat the hosel with a heat gun to 250–300°F to soften the epoxy, then twist the head off. This also lets you bake the head in a toaster oven later for faster curing.
Mask the shaft if you want to keep the original shaft. Use several layers of low-tack tape wrapped snugly up to the ferrule. One layer will lift when you spray, so wrap at least three layers.
Branch point: If the ferrule is loose or cracked, remove the shaft. Trying to paint around a damaged ferrule traps paint in the gap and looks sloppy. On putters like the Odyssey White Hot Pro, the ferrule can crack easily if you apply heat incorrectly. When in doubt, pull the shaft.
Strip the Old Finish
Apply paint stripper or acetone to the head. Let it sit per the stripper’s instructions — typically 15–30 minutes — then scrape off the softened coating using a plastic putty knife to avoid scratching the metal. Stubborn clear coats, common on Scotty Cameron Studio Style putters with an oil-can finish, may need a second application. Use 220-grit sandpaper or a brass brush on remaining residue. Rinse with mineral spirits and dry completely.
Stop/escalate threshold: If after two stripping rounds and sanding you still see patches of factory clear coat, stop. Those patches will cause the new paint to lift in sheets. Switch to a rotary tool with a non-woven abrasive pad such as a 3M Scotch-Brite pad to mechanically remove the last layer. If you don’t have one, take the head to a local shop that does media blasting. Painting over incomplete stripping guarantees failure.
Sand and Clean
Sand the entire head with 400-grit, then go over it with 600-grit to create a slight tooth for the primer to grip. Wipe with a tack cloth, then with isopropyl alcohol. Do not touch the bare metal after cleaning — skin oils cause fish-eyes that won’t cover with paint. If you see any greasy spots, wipe again with alcohol.
Mask Critical Areas
Cover the putter face (the striking area), the sole, and any engraved logos or sight lines with low-tack tape. Use an X-Acto knife to trim around cavities and inserts. For putters like the Ping Anser, the cavity is deep — use a small piece of tape folded back to avoid bridging. If you want a two-tone look, such as a black body with white paint fill, mask after the base coat dries.
Step-by-Step Painting Process
1. Apply Primer
Spray a light, even coat of metal primer from about 8 inches away. Avoid heavy puddles; runs in primer are nearly impossible to smooth without sanding through. Let the primer dry per the manufacturer’s instructions — typically 10–15 minutes at 70°F. Lightly sand with 600-grit to knock off any dust nibs, then wipe clean with a tack cloth.
2. Spray Paint
Use enamel spray paint in thin, overlapping passes. Start and stop your spray motion off the putter to avoid blobs. Apply 3–4 coats, waiting the recommended flash time between coats — usually 5–10 minutes. For a putter like an Odyssey White Hot, a satin black enamel gives a near-factory appearance. If you want a matte finish, choose a matte paint or top with a matte clear coat.
Test adhesion before clear coat: After the final paint coat dries for one hour, press a strip of low-tack painter’s tape onto a small hidden area such as the underside of the hosel. Pull it off at a 45-degree angle. If any paint comes off, the base layer wasn’t clean enough. Stop, sand the entire head back to bare metal with 400-grit, clean again, and re-prime. If no paint lifts, proceed to clear coat.
3. Cure and Clear Coat
Let the paint cure for at least 24 hours at 70°F. Warmer temperatures in the 80–90°F range speed up curing. Apply 2–3 coats of clear coat for protection, again using thin passes. Optionally, bake the head in a toaster oven at 150°F for 30 minutes — but only if the paint is rated heat-safe. Check the can — VHT Engine Enamel is fine, but some paints soften above 200°F. Wait another 24 hours before handling.
Check cure: After 48 hours of air cure at 70°F, press a thumbnail into a hidden area. If the paint indents, it’s not fully hardened. Wait another 24 hours. If it still indents, the paint may be too thick or the wrong type for metal. In that case, strip and restart. Using a water-based paint on stainless steel, for example, often stays soft.
4. Reassemble
If you removed the shaft, apply fresh epoxy — use 24-hour cure golf shaft epoxy — to the hosel and reinstall the shaft, using a shaft clamp to align the grip correctly. Torque any weight screws to the manufacturer’s specification, typically 15–20 inch-pounds. Carefully remove all masking tape. For two-tone paint fills, use a toothpick to add color to the lettering and wipe excess with a rag dampened with acetone.
Common Mistakes That Ruin the Job
Skipping primer causes paint to chip off bare stainless steel in the first round. A Scotty Cameron without primer shows bare metal after one weekend. Spraying too thick creates runs that are nearly impossible to fix without sanding and starting over — thin coats are faster overall. Not curing long enough leaves fingerprints and smudges that cannot be polished out. Painting the face, even by a few microns, changes feel and can cause skidding — always mask the striking area. Using the wrong paint type also causes trouble: acrylics peel quickly on putters that rub against bag dividers, while enamel with clear coat lasts much longer.
Frequently Asked Questions
Can I paint a putter without removing the shaft?
Yes, but mask the shaft with several layers of tape up to the ferrule. The prep and paint steps remain the same. However, you cannot bake the head in the oven with the shaft attached because the heat will damage the shaft’s epoxy.
How long does the paint last?
With proper prep and clear coat, expect 6–12 months of regular use before minor scuffs appear. Heavier bag chipping may occur sooner. A putter used daily on a practice green will show wear faster than one used only for rounds.
Do I need to bake the paint?
No. Air-curing for 48 hours at room temperature is sufficient, though baking helps enamel harden faster. Baking at 150°F for 30 minutes after clear coat can yield a finish ready for light use in 24 hours.
Can I fill the lettering with a different color?
Yes. After the base color dries, use a toothpick or syringe to apply enamel paint into the cavities, then wipe the excess with a solvent-dampened rag. This works well for putters like the TaylorMade TP line and gives a custom look without special tools.
What if the paint flakes off after a few rounds?
It usually means the primer was skipped, the surface wasn’t properly cleaned, or the paint wasn’t cured long enough before use. Strip the putter completely, sand to bare metal, clean, prime, and repaint. Spot-fixing flaking paint never holds.

Michael Reeves is a PGA Professional with over 20 years of experience in competitive golf and instruction. A former Division I collegiate player at the University of Texas, he competed on the mini-tours before transitioning to full-time coaching and golf journalism. He has been a certified PGA teaching professional since 2005 and has worked with players at every level, from absolute beginners to collegiate champions.
His writing has appeared in Golf Digest, Golf Magazine, and The Left Rough. At GolfHubz, Michael leads the editorial team, overseeing fact-checking and ensuring every answer meets the same standard he demands on the lesson tee: clear, evidence-based, and immediately useful.
When he’s not writing or teaching, Michael plays to a +1.4 handicap at his home club in Austin, Texas. He has attended over 40 major championships as a journalist and fan, and has played more than 200 courses across 15 countries.
You can reach Michael at [email protected] or follow his occasional swing analysis posts on the site.